



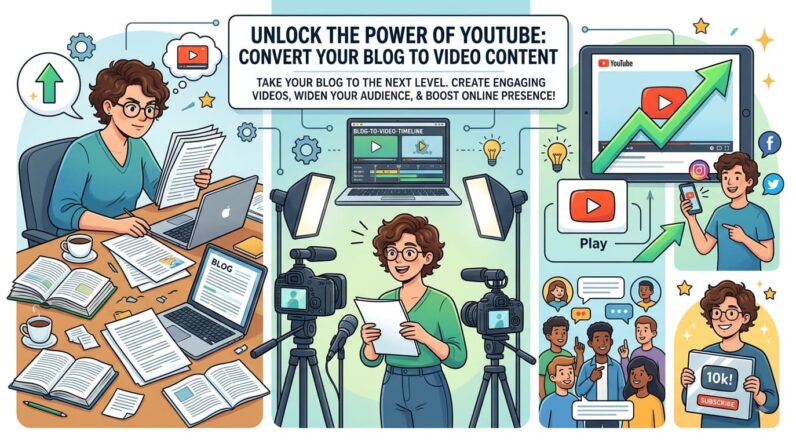
Are you a blogger looking to diversify your content and reach a wider audience? Or perhaps you already have a YouTube channel and want to make better use of the articles you have spent countless hours writing?
Converting your blog content into YouTube videos can be one of the most efficient ways to expand your online presence. Instead of starting from scratch every time you want to create a video, you can use the research, ideas, examples, and expertise already contained in your blog posts as the foundation for new video content.
The process is not simply a matter of reading your article in front of a camera, however. Successful blog-to-YouTube content requires you to rethink the material for a visual and conversational format. A blog reader can stop, skim, reread a paragraph, or jump between sections. A YouTube viewer needs a reason to keep watching from one moment to the next.
The good news is that your existing blog can give you a significant head start.
With the right approach, one blog post can potentially become a long-form YouTube video, several YouTube Shorts, social media posts, an email newsletter, and additional website content. This creates a content ecosystem where each piece supports the others instead of requiring you to constantly develop completely new ideas.
In this comprehensive guide, we’ll walk through the entire process of converting your blog into YouTube content, from choosing the right articles and writing your script to recording, editing, optimizing, publishing, and measuring your results.
Why Convert Your Blog to YouTube Content?
Before diving into the process, it is worth understanding why this strategy can be so useful for bloggers and content creators.
1. Reach a Wider Audience
Your blog may attract people who prefer reading, while YouTube gives you access to people who prefer watching and listening.
Different people consume information in different ways. Some visitors enjoy detailed articles, while others would rather watch someone explain the same topic in a 10-minute video.
By transforming your written content into videos, you give your audience another way to discover and consume your ideas.
You also create an opportunity to reach people who may never have discovered your website through traditional search.
2. Diversify Your Content
Relying entirely on one content format can limit your reach.
If you only publish blog articles, you are primarily targeting people who prefer written content. Adding video allows you to communicate through your voice, facial expressions, demonstrations, graphics, screen recordings, animations, and other visual elements.
This makes your content more flexible and accessible.
For example, a blog article about setting up a home office could become a YouTube video showing the actual workspace, demonstrating equipment, explaining organization techniques, and visually comparing different setups.
The written article provides information, while the video provides an experience.
3. Increase Engagement
YouTube gives your audience multiple ways to interact with your content.
Viewers can leave comments, ask questions, like videos, share content, subscribe to your channel, and watch additional videos.
This creates opportunities to build a community around your content rather than simply attracting one-time website visitors.
Comments can also provide valuable information about what your audience wants to learn next. If viewers repeatedly ask questions about a particular subject, those questions can become future blog posts or videos.
4. Create Additional Search Opportunities
Your blog and YouTube channel can support each other.
A blog post may attract visitors from traditional search engines, while a related YouTube video can attract viewers searching within YouTube.
You can then connect the two by embedding your video into the corresponding blog post and linking readers to additional resources.
This creates multiple paths through which someone can discover your brand.
However, avoid assuming that simply uploading a video will automatically improve your Google rankings. Search visibility depends on many factors, and YouTube and traditional search have different ranking systems.
5. Create Additional Monetization Opportunities
YouTube can provide additional monetization possibilities depending on your channel’s eligibility and the policies applicable to your account.
Potential revenue sources can include advertising, sponsorships, memberships, affiliate marketing, digital products, services, and other business opportunities.
The important point is that monetization should not be the only reason to create videos.
A useful video can attract an audience first. That audience can then create opportunities for revenue later.
Choosing the Right Blog Posts to Convert
Not every blog article should automatically become a YouTube video.
Some articles are naturally suited to video, while others may work better as written resources.
Start by reviewing your existing content and identifying articles with strong potential.
Look for Popular Articles
Check your website analytics and identify articles that already attract significant traffic.
If an article consistently attracts readers, there is a reasonable chance that its subject may also interest viewers.
Popular content can provide a useful starting point because you already have evidence that people are interested in the topic.
Look for How-To Content
Tutorials and step-by-step guides are particularly easy to convert into videos.
For example:
- How to Build a Website
- How to Start Freelancing
- How to Create a Budget
- How to Grow Vegetables
- How to Edit YouTube Videos
- How to Set Up a Home Office
These subjects naturally lend themselves to demonstrations and visual explanations.
Look for Problem-Solving Articles
Articles that solve a specific problem can also perform well as videos.
Ask yourself:
“Would someone benefit from watching me explain this rather than simply reading it?”
If the answer is yes, the article may be a strong candidate.
Look for Evergreen Content
Evergreen articles remain relevant for a long time.
Topics such as beginner guides, tutorials, educational explanations, checklists, and general advice can potentially continue generating views long after publication.
These subjects are particularly useful if you want to build a library of videos that can continue attracting viewers over time.
Converting Your Blog Post Into a YouTube Script
One of the biggest mistakes beginners make is simply reading their blog article word for word.
Written language and spoken language are different.
A paragraph that looks perfectly natural on a webpage may sound robotic when spoken aloud.
Instead, treat the blog post as your research document and create a new script based on its key ideas.
Start With a Strong Hook
The first few seconds of a video are extremely important.
Instead of beginning with a long introduction about yourself, immediately tell viewers what they are going to learn or why they should care.
For example:
“If you’ve already spent years building a blog, you may be sitting on dozens of potential YouTube videos without realizing it.”
This creates curiosity and establishes a reason to continue watching.
Introduce the Problem
Explain the problem your video is going to solve.
Tell viewers what they will gain by watching until the end.
For example:
“In this video, I’ll show you how to take one existing blog post and turn it into a complete YouTube video without starting your research from scratch.”
This gives the viewer a clear expectation.
Break the Article Into Sections
Take your blog headings and convert them into video chapters.
A 2,500-word article might contain six or seven major sections.
Each section can become a segment of your video.
However, you do not need to include every sentence from the original article.
Remove repetitive explanations and focus on the most useful information.
Add Spoken Transitions
Written articles can jump between headings without much explanation.
Videos benefit from transitions.
For example:
“Now that we’ve covered how to choose the right blog post, let’s look at the most important part—turning that article into a script that actually sounds natural.”
These transitions help viewers understand where they are in the video.
End With a Clear Conclusion
Summarize the main lessons and give viewers a logical next step.
You could encourage them to:
- Visit your blog
- Read the original article
- Subscribe to your channel
- Watch another related video
- Download a free resource
- Leave a comment
- Join your email list
Do not overwhelm viewers with five different calls to action. Choose the action that matters most for that particular video.
Step-by-Step Guide to Converting Your Blog to YouTube Content
Now let’s look at the complete workflow.
1. Choose Your Content
Start by selecting blog posts that resonate with your target audience and have a clear video angle.
Look for articles that contain useful information, interesting examples, strong opinions, tutorials, comparisons, or stories.
You should also consider whether the topic can be explained visually.
A recipe, software tutorial, home improvement guide, fitness demonstration, or technology walkthrough is naturally visual.
A highly technical article may require more creativity to translate into video.
2. Rewrite and Simplify the Article
Read your original article and identify the most important points.
Remove information that is repetitive or unnecessary.
Then rewrite the remaining content in a conversational style.
Imagine that you are explaining the subject to one person sitting across from you.
Instead of writing:
“There are several factors that should be considered when determining the appropriate strategy.”
Say:
“Before you choose a strategy, there are a few things you need to consider.”
The second version is easier to say and easier to understand.
3. Create a Storyboard
A storyboard does not need to be complicated.
Simply plan what viewers will see while you are speaking.
For example:
Narration: Explain why blog content can be repurposed.
Visual: Show a blog article on a laptop.
Narration: Explain how to choose an article.
Visual: Show a list of potential blog topics.
Narration: Explain how to create the script.
Visual: Show the article being converted into a video outline.
This prevents your video from becoming nothing more than a talking head for ten minutes.
4. Record Your Video
You do not need an expensive camera to begin.
Modern smartphones can produce excellent video when used correctly.
More important than having expensive equipment is making sure you have:
- Good lighting
- Clear audio
- A stable camera
- A clean background
- A quiet recording environment
Audio quality is especially important.
Viewers may tolerate average video quality, but poor or distracting audio can cause them to leave quickly.
5. Edit the Video
Editing gives you an opportunity to remove mistakes, improve pacing, and add visual interest.
You can remove:
- Long pauses
- Repeated sentences
- Mistakes
- Unnecessary tangents
- Dead space
You can also add:
- Text overlays
- Screenshots
- Images
- B-roll
- Animations
- Charts
- Screen recordings
- Background music
The goal is not to make every second visually chaotic.
Instead, use visuals when they help explain or reinforce what you are saying.
6. Optimize for YouTube
Your video needs to be packaged effectively before you publish it.
Pay attention to:
Title
Create a title that clearly communicates the video’s benefit.
Instead of:
“My Blog Video #12”
consider:
“How to Turn Any Blog Post Into a YouTube Video”
The second title immediately tells viewers what they will learn.
Thumbnail
Your thumbnail should communicate the idea quickly.
Use a simple visual concept and limited text.
Avoid filling the thumbnail with paragraphs of information.
Description
Write a useful description explaining what the video covers.
Include relevant information and links to related resources.
If your video is based on a blog article, you can include a link to the corresponding article when appropriate.
Chapters
For longer videos, chapters can help viewers navigate the content.
Use clear chapter names that tell viewers what each section contains.
Turning One Blog Post Into Multiple YouTube Videos
You do not have to limit yourself to one video per article.
A comprehensive blog post may contain several smaller topics that deserve their own videos.
For example, imagine you have a 3,000-word article titled:
“The Complete Beginner’s Guide to Affiliate Marketing.”
You could potentially turn it into:
- What Is Affiliate Marketing?
- How Affiliate Links Work
- How to Choose an Affiliate Niche
- How to Find Affiliate Programs
- How to Create Affiliate Content
- How to Get Affiliate Traffic Without Ads
- Common Affiliate Marketing Mistakes
Now one blog post has become an entire video series.
This approach can save enormous amounts of research time because you already have the foundation for every video.
Turn Your YouTube Video Back Into Blog Content
Content repurposing works in both directions.
After creating a YouTube video, you can use the video as the foundation for additional written content.
Create a transcript and edit it into an article.
Then add:
- Headings
- Images
- Screenshots
- Additional explanations
- Internal links
- Frequently asked questions
- Helpful resources
Now your video becomes a blog post.
This creates a powerful content cycle:
Blog post → YouTube video → Short video → Social media posts → Email newsletter → Updated blog post
Instead of creating completely different content for every platform, you are adapting one core idea into multiple formats.
Tips and Tricks for Better Blog-to-YouTube Videos
1. Keep It Concise
Long does not automatically mean better.
If your original blog post contains 4,000 words, you do not necessarily need to create a 30-minute video.
Focus on delivering the information efficiently.
If the topic can be explained in eight minutes without sacrificing value, make an eight-minute video.
2. Add Visuals
One of the biggest advantages of YouTube is the visual format.
Use screenshots, demonstrations, diagrams, animations, charts, examples, screen recordings, and B-roll whenever they improve understanding.
Visuals should support the explanation rather than simply exist for decoration.
3. Use a Conversational Tone
Write your script as though you are talking to a real person.
Use natural language.
Ask questions.
Give examples.
Explain concepts in simple terms.
You can still demonstrate expertise without sounding like you are reading an academic paper.
4. Be Authentic and Engaging
Your personality can become part of your content.
Share personal experiences, lessons learned, mistakes, observations, or examples when appropriate.
Viewers often connect with creators because of their perspective, not simply because of the information they provide.
You do not need to create an exaggerated on-camera personality.
Being clear, enthusiastic, helpful, and genuine is often enough.
5. Consistency Is Key
You do not necessarily need to publish every day.
A realistic schedule that you can maintain is more valuable than an ambitious schedule that causes burnout.
For example, you might publish one quality video every week.
Over twelve months, that could produce more than 50 videos.
That growing library can become an important long-term asset for your channel.
How to Make Your Videos More Engaging
Creating a video is only the beginning. You also need to keep viewers interested.
Use Open Loops
Introduce an interesting idea early and promise to explain it later.
For example:
“There’s one mistake most bloggers make when turning their articles into videos, and I’ll show you exactly what it is later in this video.”
This creates curiosity.
Change Your Visuals
Do not leave the same shot on screen for the entire video.
Switch between your camera, screenshots, graphics, demonstrations, and relevant B-roll.
The changes do not need to be dramatic.
Even simple visual variation can make educational content easier to watch.
Tell Stories
Whenever possible, use examples and real situations.
Instead of simply explaining a concept, show how it applies to an actual scenario.
Stories make abstract ideas easier to understand and remember.
Ask Questions
Invite viewers to participate.
For example:
“What’s the most successful blog post you’ve ever written? Let me know in the comments.”
Questions can encourage discussion and give you ideas for future content.
Recommended Tools and Resources
You do not need a massive collection of expensive software to get started.
1. Cameras and Smartphones
A modern smartphone can be enough for beginners.
If you eventually want to upgrade, consider investing in a dedicated camera.
However, prioritize lighting and audio before spending a large amount of money on camera equipment.
2. Microphones
A good microphone can make a noticeable difference.
Depending on your setup, you might consider a USB microphone, lavalier microphone, or shotgun microphone.
Choose one that fits your recording environment and workflow.
3. Video Editing Software
Popular editing options include Adobe Premiere Pro, Final Cut Pro, DaVinci Resolve, and iMovie.
Beginners should choose software that they can learn comfortably rather than assuming the most expensive program is automatically the best.
4. Screen Recording Software
If your blog focuses on software, websites, tutorials, or online services, screen recording can become one of your most useful tools.
You can record your screen while explaining exactly what you are doing.
This is often much more effective than trying to explain software entirely through talking-head footage.
5. Thumbnail Design Tools
Your thumbnail is one of the first things potential viewers see.
Use a design tool to create clear, recognizable thumbnails with strong visual hierarchy.
Keep the design consistent so viewers begin recognizing your videos.
6. SEO and Keyword Research Tools
Keyword research can help you understand what your audience is searching for.
Tools such as Ahrefs, Semrush, Google Trends, and other keyword research platforms can provide useful insights.
However, do not rely exclusively on keyword volume.
A topic with lower search volume can still be valuable if the audience is highly relevant.
7. YouTube Analytics
YouTube Analytics provides valuable information about how viewers interact with your videos.
Pay attention to metrics such as:
- Views
- Watch time
- Audience retention
- Click-through rate
- Traffic sources
- Returning viewers
- Subscriber changes
Do not obsess over a single metric.
Instead, look for patterns.
If viewers consistently leave during a particular section, examine what happens there.
If a certain topic attracts significantly more viewers, consider creating related videos.
Using YouTube Analytics to Improve Your Blog Strategy
Your YouTube data can actually influence your future blog content.
Suppose you publish a video about “How to Start Freelancing.”
It performs reasonably well, but viewers consistently ask about pricing services.
That is a signal.
You could create:
Blog post: How to Price Your Freelance Services
YouTube video: How Much Should a Beginner Freelancer Charge?
Short: Three Mistakes Freelancers Make When Setting Their Prices
Email: A Simple Freelance Pricing Formula
One audience question can therefore become an entire content cluster.
This is one of the most powerful benefits of combining blogging with YouTube.
Common Mistakes When Converting Blogs to YouTube
Reading the Article Word for Word
This often results in a stiff and unnatural presentation.
Use the article as your source material rather than treating it as a teleprompter script.
Making the Video Too Long
Do not add unnecessary information simply to increase video length.
Respect your audience’s time.
Ignoring the Introduction
A slow introduction can cause viewers to leave before reaching the valuable information.
Get to the point quickly.
Using Too Many Affiliate Promotions
If every video feels like an advertisement, viewers may stop trusting your channel.
Provide value first.
Ignoring Audio
A beautiful video with terrible sound can still perform poorly.
Invest time in recording clean audio.
Publishing Without a Thumbnail Strategy
A great video needs an effective package.
The title and thumbnail should work together to communicate the video’s value.
Recommended Channels and Courses
If you want to improve your YouTube skills, educational resources can help you learn faster.
1. YouTube Creator Academy
YouTube’s own educational resources can help creators understand the fundamentals of channel development, audience engagement, and platform features.
Because platform policies and features can change, official resources are particularly useful for learning current requirements.
2. Blogging-to-YouTube Courses
There are courses specifically focused on content repurposing and turning written material into videos.
When evaluating a course, look for one that teaches fundamental skills rather than promising instant success.
3. Scriptwriting Courses
Learning how to write for spoken communication can dramatically improve your videos.
Focus on courses that teach hooks, storytelling, pacing, transitions, audience retention, and conversational writing.
4. YouTube SEO Courses
YouTube optimization can help you understand how viewers discover videos.
Learn about search intent, titles, thumbnails, descriptions, audience retention, and content strategy rather than relying on outdated “secret algorithm” techniques.
A Simple Blog-to-YouTube Workflow
If you want to start immediately, use this simple process:
Step 1: Pick One Successful Blog Post
Choose an article that already receives traffic or has a topic you know your audience cares about.
Step 2: Identify the Main Promise
Determine the single most important thing the viewer should learn.
Step 3: Create a Video Outline
Turn the article’s main headings into a simple video structure.
Step 4: Write a Conversational Script
Rewrite the material so it sounds natural when spoken.
Step 5: Plan Your Visuals
Decide where you will use screen recordings, images, charts, demonstrations, B-roll, and text.
Step 6: Record
Focus on clear audio, good lighting, and confident delivery.
Step 7: Edit
Remove unnecessary pauses and mistakes and add visuals that reinforce the information.
Step 8: Create the Thumbnail and Title
Make the video’s value immediately obvious.
Step 9: Publish
Write a useful description and add relevant links and chapters where appropriate.
Step 10: Analyze
After the video has had time to gather data, examine its performance and use those insights to improve your next video.
Conclusion
Converting your blog into YouTube content is much more than copying and pasting an article into a video script. It is an opportunity to take the knowledge, research, and ideas you have already created and present them in a completely different format.
Your blog provides the foundation.
YouTube provides another way to distribute it.
Together, they can create a powerful content ecosystem.
A single blog post can become a long-form video, several short videos, social media posts, an email newsletter, and even future articles. This allows you to get significantly more value from the work you have already done.
The key is to adapt rather than simply duplicate.
Make your scripts conversational. Add visuals. Use examples. Create strong openings. Keep your videos focused. Pay attention to your audience’s questions and study your analytics.
Most importantly, be consistent.
You do not need expensive equipment, a massive production team, or hundreds of thousands of subscribers to begin. Start with the blog content you already have, choose one article, turn it into one useful video, and learn from the results.
Over time, you can build a library of videos that expands your reach, strengthens your brand, brings new visitors to your website, and gives your existing content a much longer life.
Your next YouTube video may already be sitting inside your blog. You just need to press record.


